How to create a custom role
Last updated: October 7, 2026
Custom roles let you give people exactly the access they need when none of the default roles fit. This walks through creating one, from choosing a starting point to moving people onto it.
What the permissions mean and how they fit together is covered in Custom roles explained.
Step 1: Choose where to start
Open Settings > Roles. There are three ways to begin, and they all end at the same create form.
From scratch. Create a new role and tick the permissions you want. You start at 0 of 19 and build up. Best when the role bears no resemblance to anything you already have.
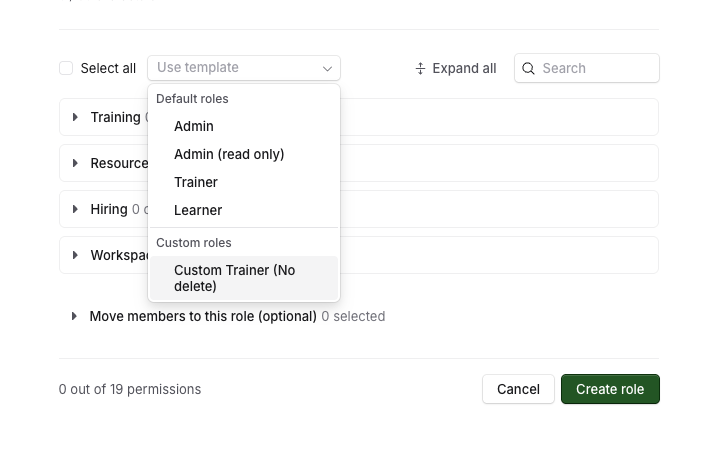
From a template. In the create form, use Use template and pick any existing role, including another custom role. Its current permissions are ticked for you and you adjust from there.
By duplicating. Open a role and use Duplicate role. You get the create form pre-filled with the same permissions. Duplicating does not create anything on its own, so you still have to name it and save.
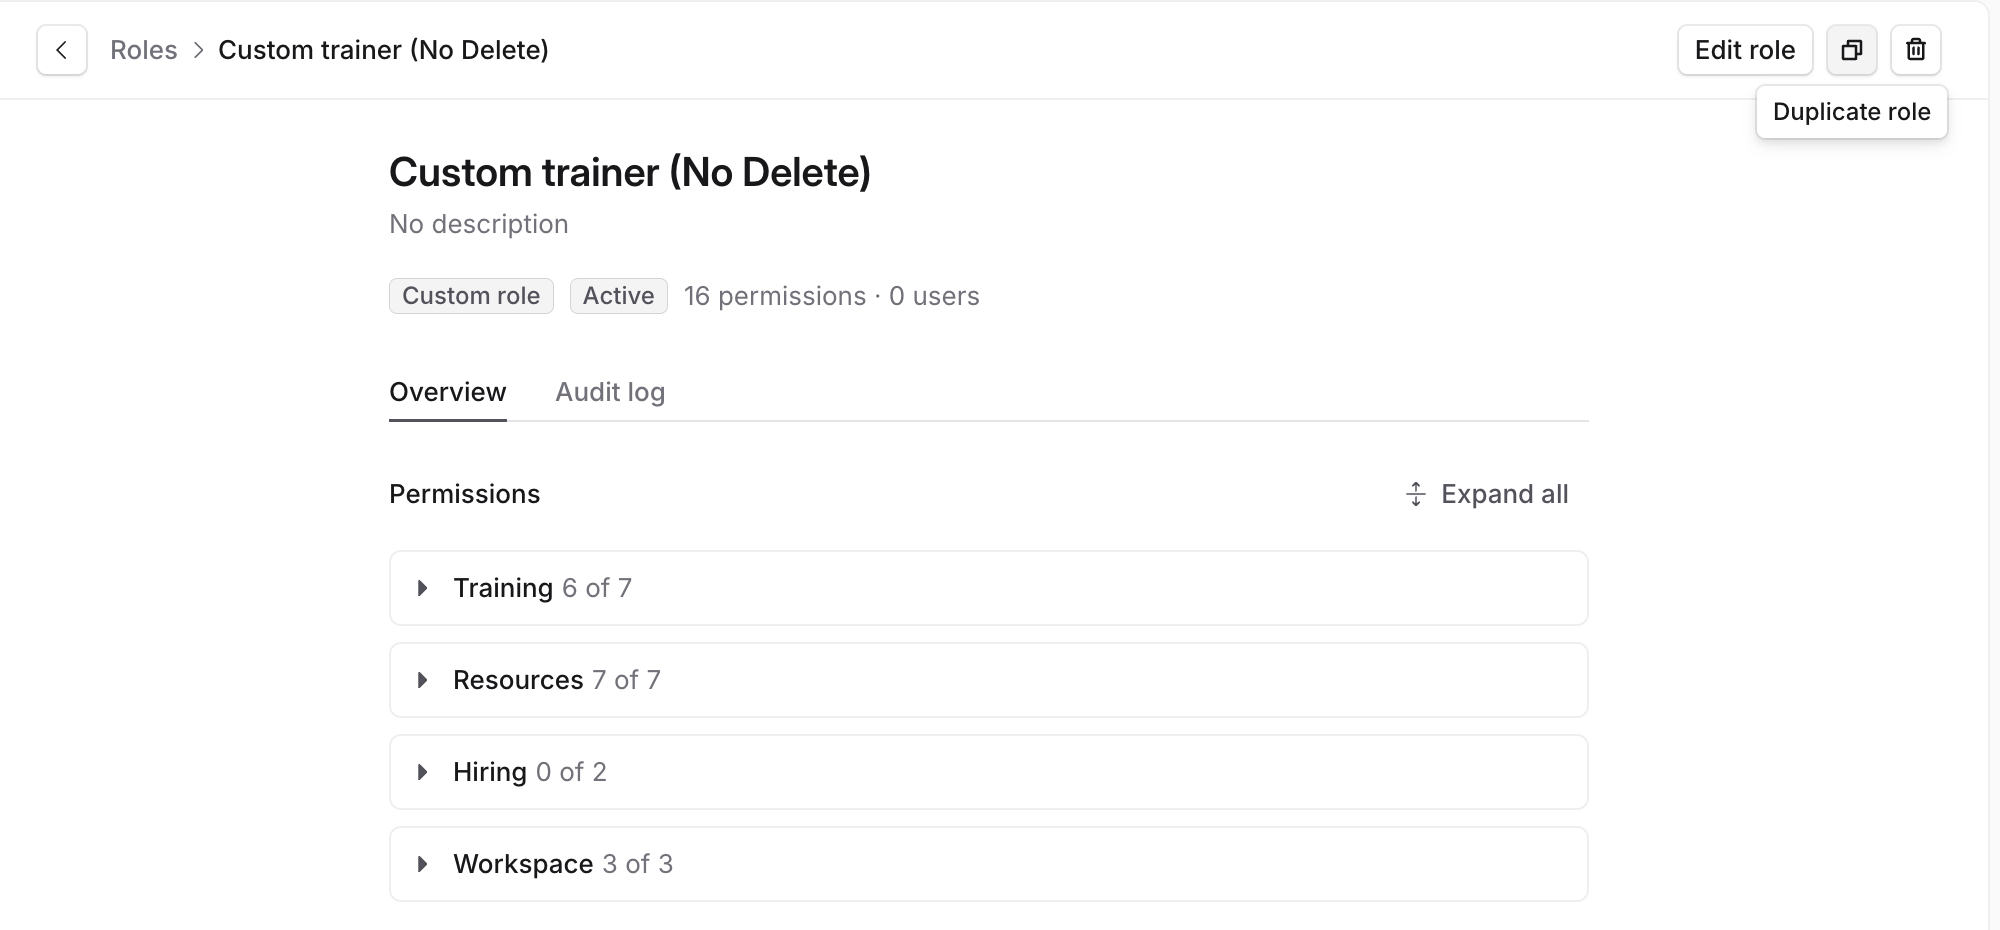
Whichever you pick, the new role is independent from the moment you save it. A template and a duplicate are both one-time copies, so later changes to the role you copied do not reach the copy. Two roles that need to stay in step have to be changed twice.
Step 2: Name the role
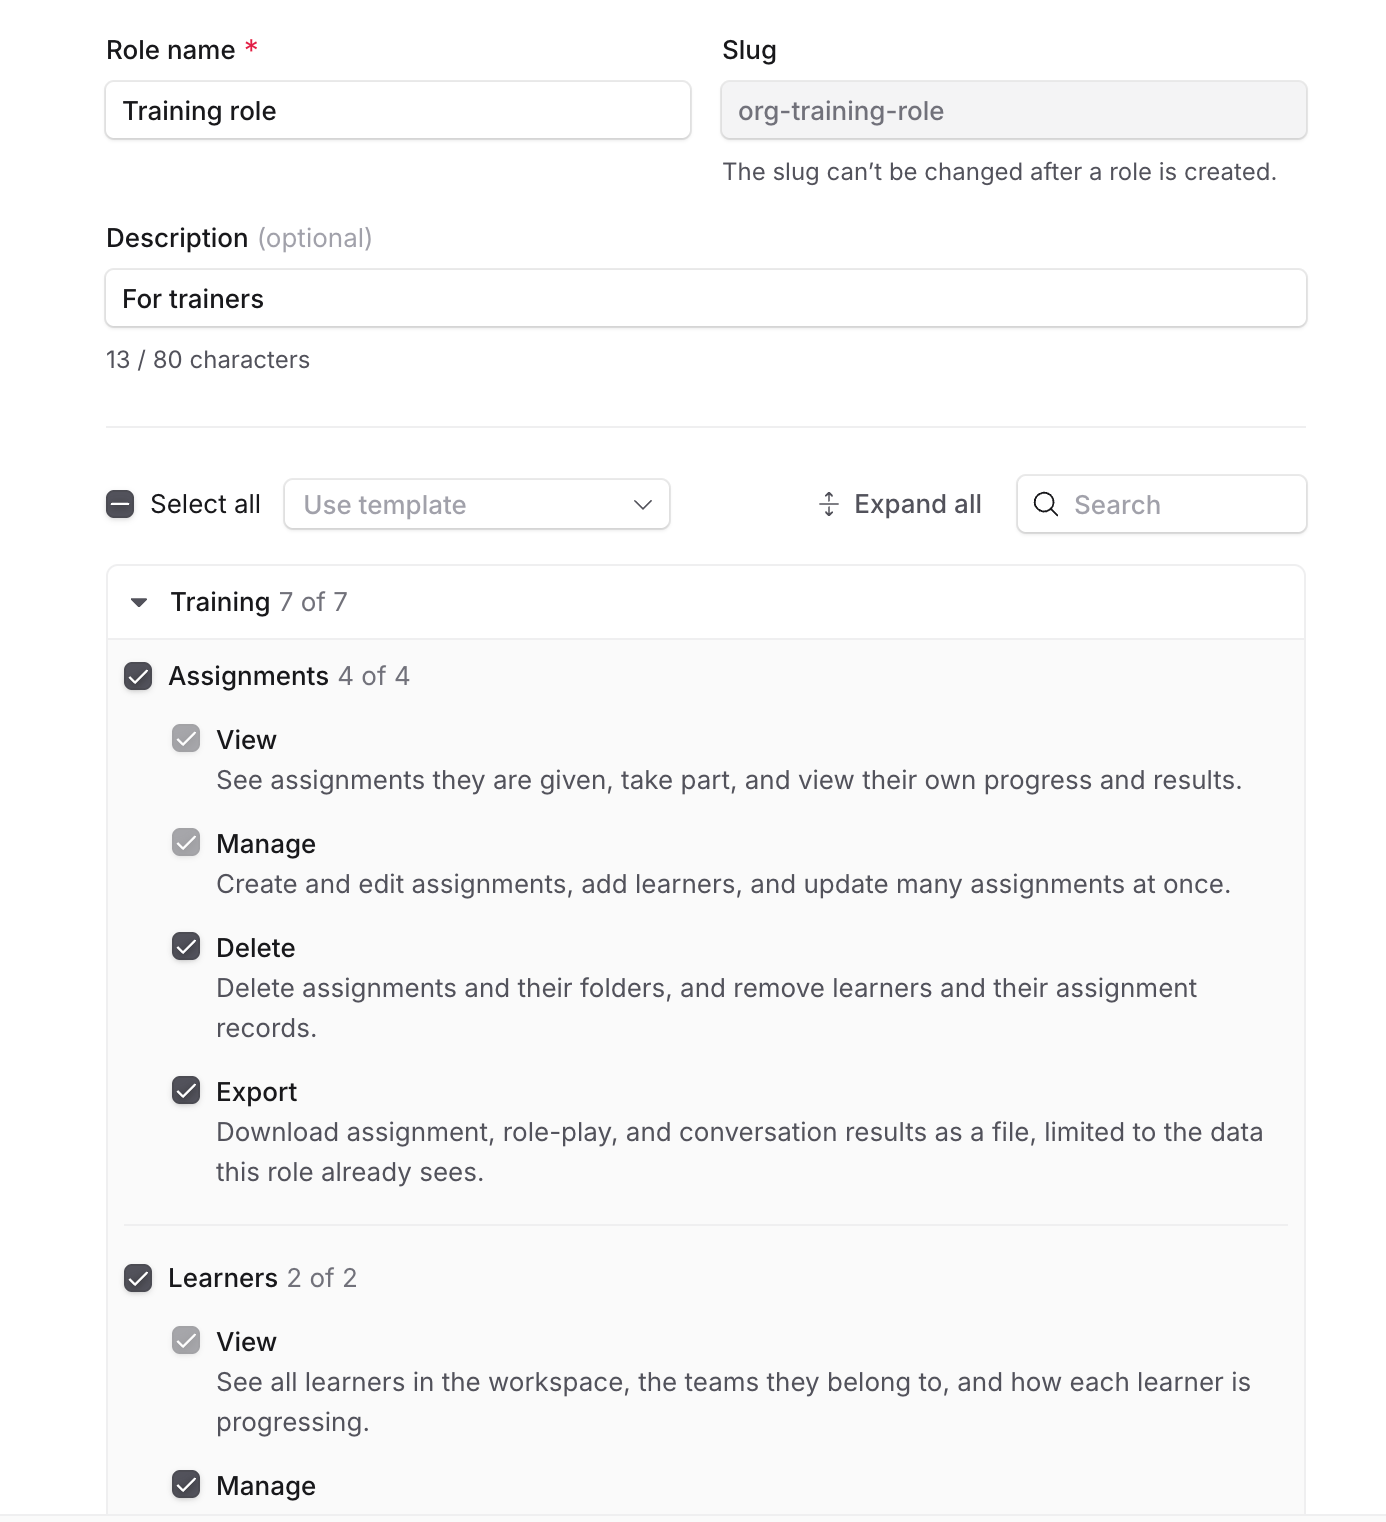
Role name is required. Name the role for the job it does rather than the person doing it, and keep it consistent with your other roles.
Slug fills itself in from the name and cannot be changed once the role exists. It is the name in lower case, with spaces turned into hyphens and characters like brackets removed, so Product Demo (Q3) becomes
product-demo-q3. The form says so under the field.Description is optional, up to 80 characters. It appears beside the role in the list, which saves your colleagues guessing what Support Tier 2 was for.
The name matters more than it looks if you use single sign-on, because your identity provider's values map to the role by name and slug. A tidy, stable set of names makes that mapping easier to set up and to audit later, so it is worth agreeing the convention with whoever owns your identity provider before you create several roles.
You can rename a role afterwards and the slug stays as it was. Renaming is blocked while IdP role assignment is switched on, which is covered in Custom roles with SSO and SCIM.
Step 3: Choose the permissions
Tick what the role should be able to do. The list is grouped into Training, Resources, Hiring and Workspace, and the footer counts what you have selected out of 19.
Expand all opens every group at once, and the search box finds a permission by name when you know what you are looking for.
Permissions build on each other, so ticking Delete also ticks View and Manage. Custom roles explained covers how that works and what it means when you untick something.
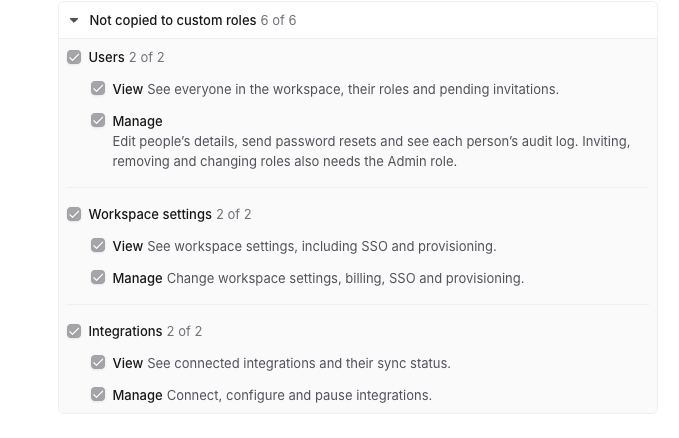
If you started from a template or a duplicate, expect fewer permissions than the role you copied. Default roles hold some that custom roles cannot have, and these sit under Not copied to custom roles on the role's detail page so you can see what is being left behind. A duplicate of Trainer is not a second Trainer, and a duplicate of Admin does not carry Admin's authority.
Step 4: Move people onto it, if you want to
Move members to this role near the bottom of the form lets you pick who should hold the role, with a count of how many you have selected. They are moved as part of creating it.
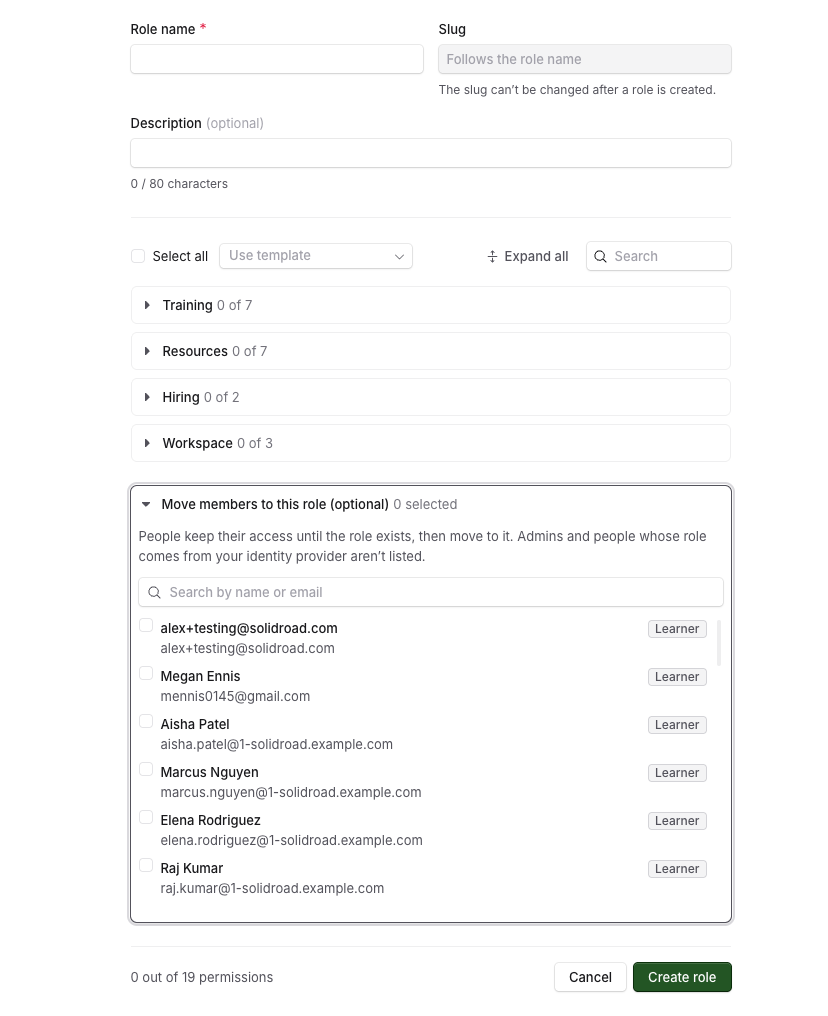
You can skip this step. The role is created empty and you can assign people whenever you are ready.
Not everyone will be selectable. Admins are protected, and anyone whose role comes from your identity provider is managed there rather than here.
Step 5: Create the role
Click Create role. The role will continue to create in the background even if you navigate away from the page, so don't worry about losing your progress. The new role then shows in Settings > Roles with a Custom label.
Adding people later
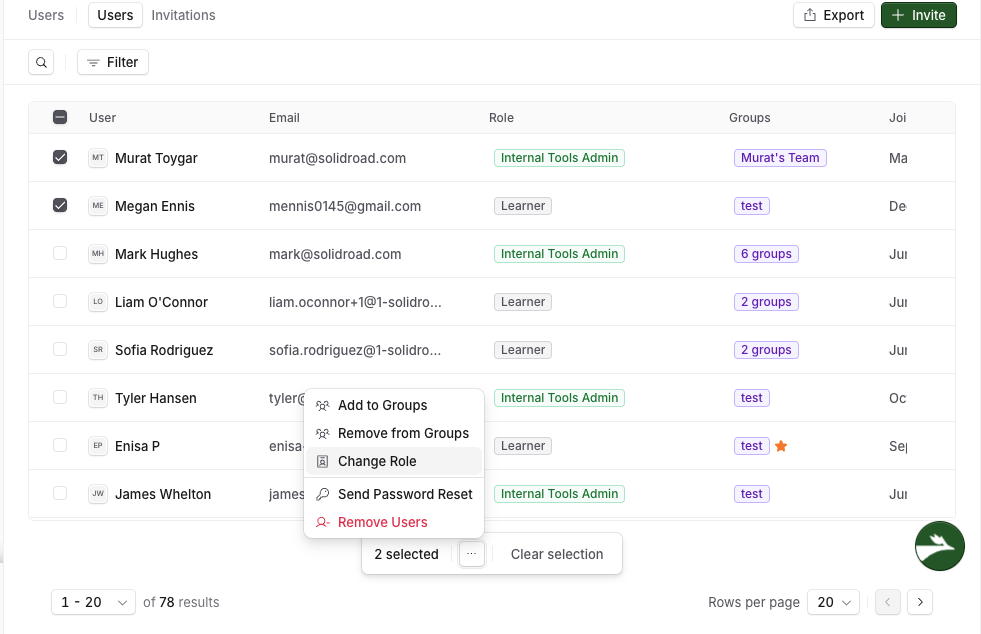
Go to Settings > Users, tick the people you want, and use the ... menu in the bar at the bottom of the list. Change Role moves everyone you selected in one go. The Role column shows what each person holds, so you can check that if the change was successful.
Related articles
If you have any further questions, contact the Solidroad team via the Help tab in the platform.