How to create assessments for hiring
Last updated: September 14, 2026
Hiring assessments let you send a Solidroad simulation to job candidates and compare their scored results side by side. This article takes you from creating an assessment to testing it, sharing the link with candidates, checking who has submitted and reviewing each candidate’s feedback. It finishes with how to keep a growing list of assessments organised in folders.
Create the assessment
Click Hiring in the left panel, then select the Assessments tab. Hiring assessments live here, separately from training content.
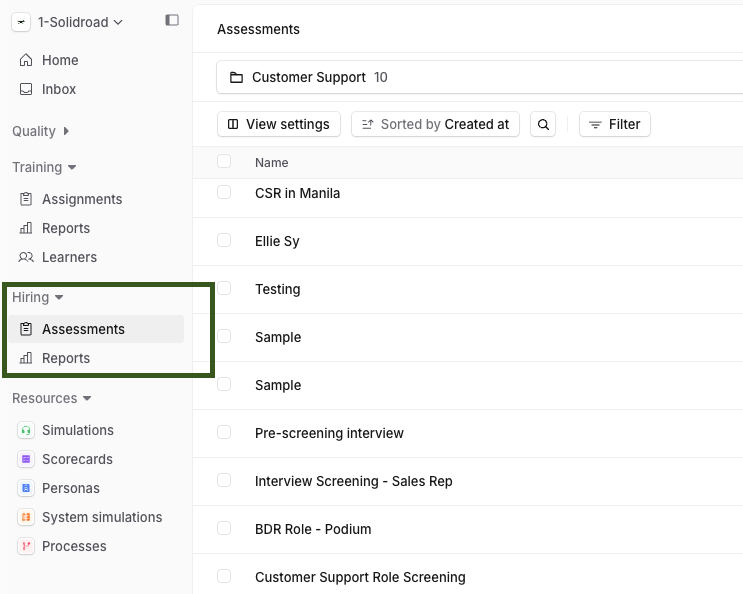
Click Create. The Create Assessment page opens.
Fill in the assessment details:
Name, which candidates will see.
Candidate instructions, any notes or guidance the candidate should read before starting.
Attempt limit, how many times a candidate can retake the assessment.
Click Add simulations, select one or more simulations from your saved simulations, then click Done.
Click Create. The assessment is saved and opens on its own screen.
Test the assessment
Run through the assessment yourself before any candidate sees it. This catches a broken simulation, confusing instructions or a wrong attempt limit while you can still change them.
From the assessment screen, click Test.
In the pop-up, click Continue. A status screen lists each simulation in the assessment, the number of attempts taken and its status (not started or submitted).
Click Start, then Start Interview, to take a simulation as a candidate would.
If anything needs changing, use Edit or Delete on the assessment screen. Make all your edits before you share the link. Changes made after candidates have started can give candidates who started at different times a different experience.
Share the assessment with candidates
From the assessment screen, copy the public link and send it to your candidates. This link is what candidates use to take the assessment.
Track assessment statuses and results
Go to the Assessments tab and click the assessment you want to check.
Use the filters to show submitted assessments, or to see who has not yet submitted. Filtering out incomplete attempts and your own test runs keeps the view to real candidate results.
View a candidate’s feedback
Click a candidate’s result to open their assessment status page.
Click the dropdown arrow beside the score.
Click View Feedback. The full feedback page opens, showing the detail behind the score.
Organise assessments into folders
On the Assessments tab, use the search box to find an assessment by name, or apply filters to narrow the list.
Click the folder icon next to Create to add a new folder. New folders appear at the top of the panel.
Select the assessments you want to include and add them to the folder.
Related articles
If you have any further questions, contact the Solidroad team via the Help tab in the platform.