How to set up SSO & SCIM
Last updated: September 15, 2026
Set up SAML-based single sign-on (SSO) and directory sync (SCIM) so your IT team controls who can access Solidroad from your identity provider. This article takes you through verifying your email domain, configuring SSO and, if you want automated provisioning, configuring SCIM. By the end, everyone on your verified domain signs in through your identity provider, and users can be created, updated and deactivated from your directory.
Solidroad supports SAML 2.0 identity providers including Okta, Microsoft Entra ID (Azure AD), Google Workspace, Ping Identity and OneLogin. OIDC and EASIE are also supported for less common setups. Directory sync uses SCIM 2.0, requires an active SSO connection, and is available with supported providers including Okta and Microsoft Entra ID.
Before You Begin
Make sure you have the following in place before starting setup:
An identity provider that supports SAML 2.0 (Okta, Microsoft Entra ID, Google Workspace, Ping, OneLogin, etc.)
An IT contact who can configure SAML app settings in your IdP and add DNS records for your domain
The email domain(s) you want to enable SSO for (e.g.,
@yourcompany.com)At least one admin user already set up in your Solidroad workspace
SSO is enforced per domain. Once SSO is enabled for a domain, email and password login is disabled for every user on that domain, and they must sign in through your identity provider. Users on other domains can keep using email and password. Tell your team before you go live. Directory sync is optional: you can run SSO on its own and manage users manually.
Once SSO is enabled for your domain, email/password login will be disabled for users on that domain. Make sure your team is aware before going live.
Start setup and verify your Domain
Before setting up SSO or SCIM, you must first verify that you own your email domain via DNS.
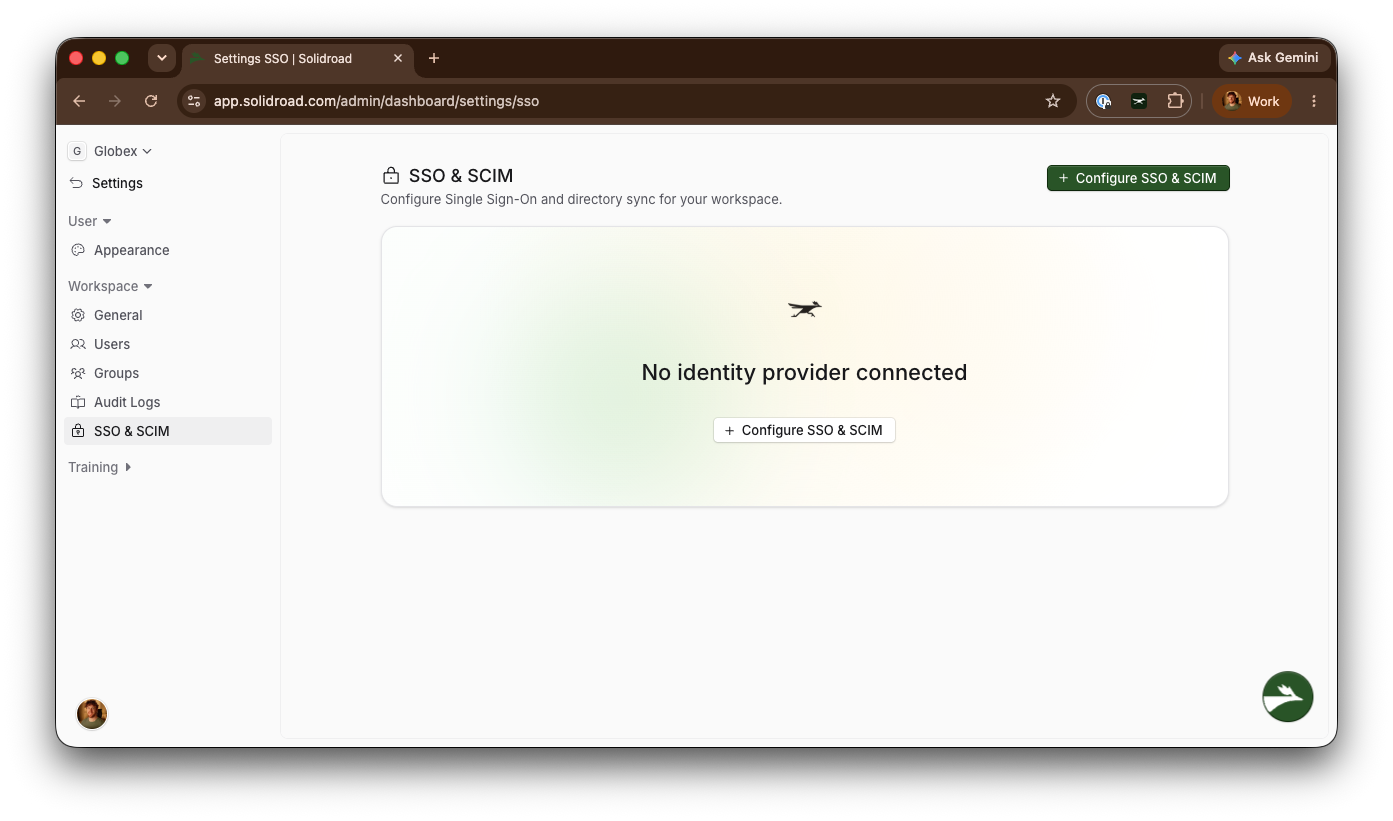
In your Solidroad SSO & SCIM settings, click + Configure SSO & SCIM. The domain verification flow opens.
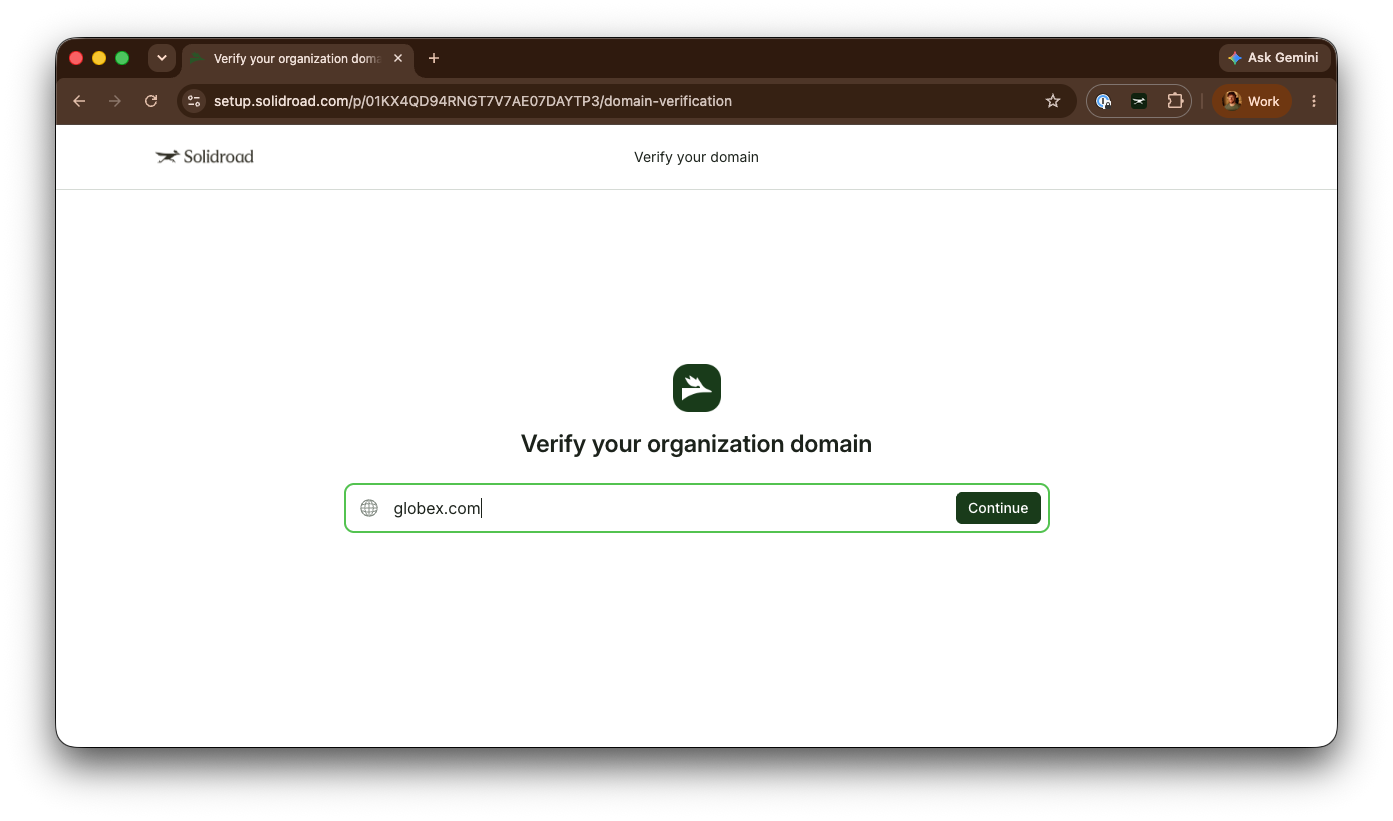
Enter the domain you'd like to verify (e.g.,
yourcompany.com) and select Continue
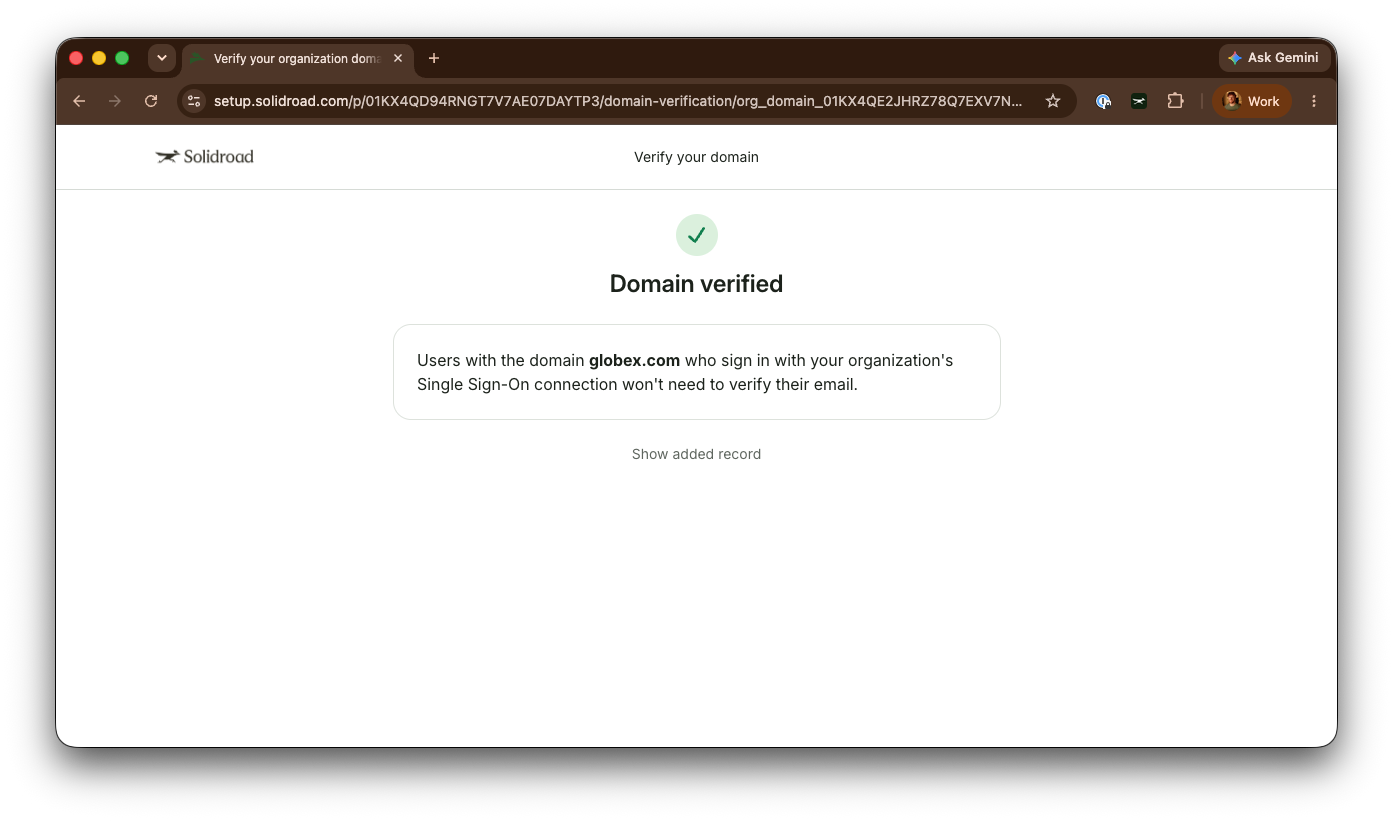
Add the DNS record shown to your domain’s DNS settings, then complete verification. Once Solidroad detects the record, the domain shows as Verified.
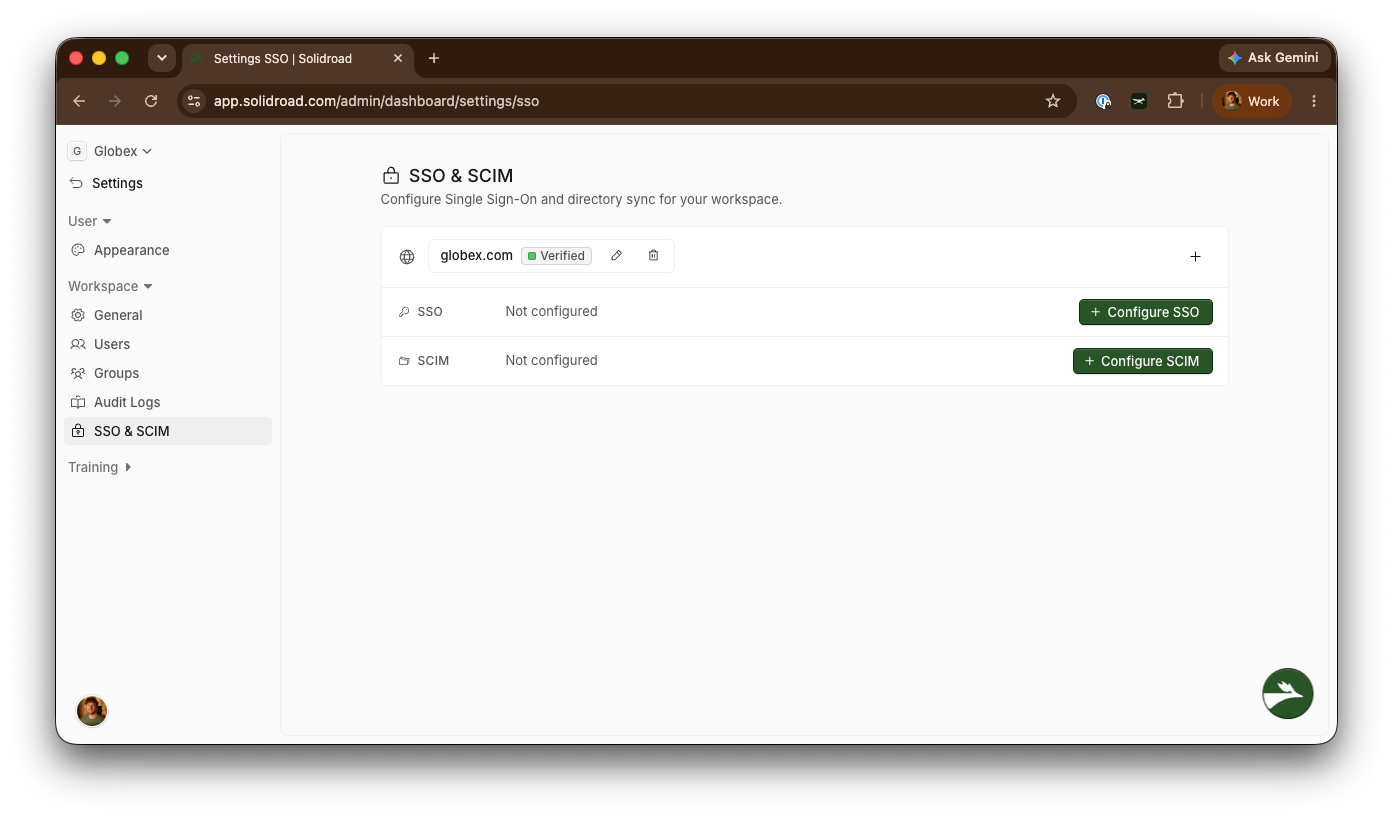
To add another domain, use the + button on the right of the domains table. If your domain won’t verify, contact Solidroad support.
Configuring SSO
Once your domain is verified, you can set up SSO directly from Solidroad.
In your SSO & SCIM settings, click Configure SSO to open the guided setup
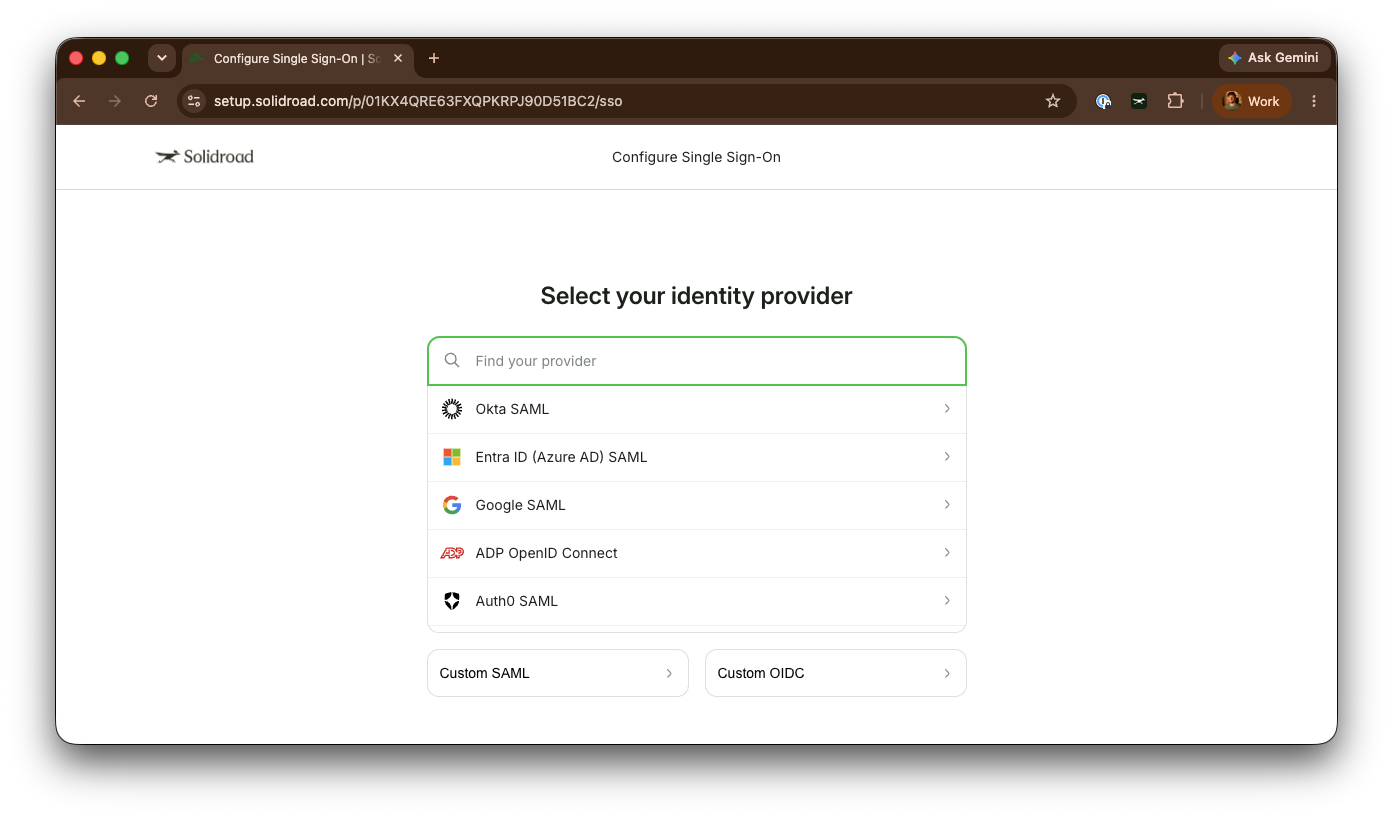
Follow the guided steps, they include direct guidance for all major identity providers (Okta, Microsoft Entra ID, Google Workspace, Ping Identity, OneLogin, and more)
During setup you can optionally map custom claims (such as
roleandgroups) to drive role and group provisioning, see Automated Role & Group Provisioning below. These are not mandatory at this point of setup.
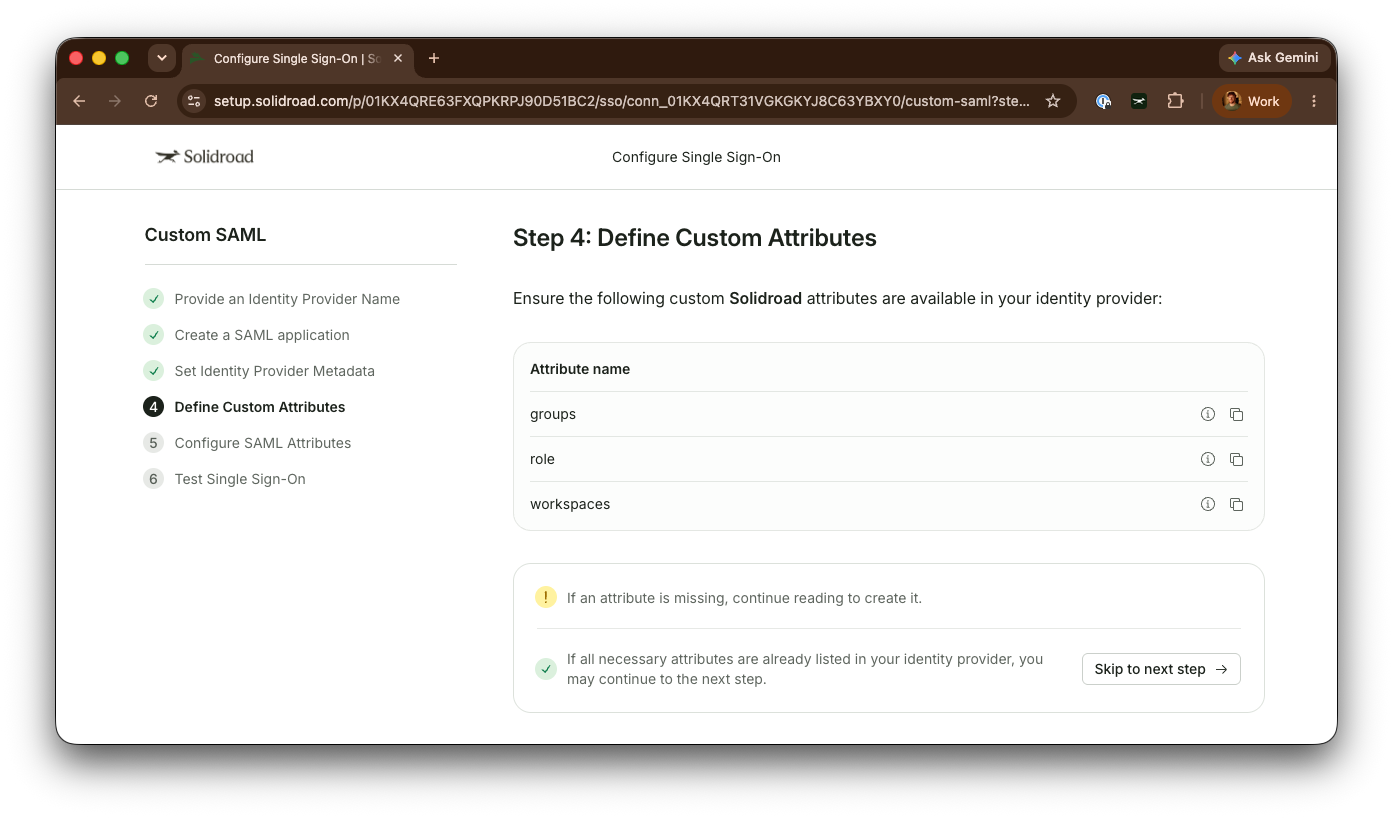
You can reconfigure your connection at any time by returning to the setup page and clicking the pencil icon next to the connection.
Once your connection is configured and active, all users on your verified domains must authenticate through your IdP.
A raw SAML request should look something like this:
<saml:Subject>
  <saml:NameID Format="urn:oasis:names:tc:SAML:1.1:nameid-format:emailAddress">alice@example.com</saml:NameID>
  ...
</saml:Subject>

<saml:AttributeStatement>
  <saml:Attribute Name="email" NameFormat="urn:oasis:names:tc:SAML:2.0:attrname-format:unspecified">
    <saml:AttributeValue xsi:type="xs:string">hank.scorpio@globex.example</saml:AttributeValue>
  </saml:Attribute>
  <saml:Attribute Name="firstName" NameFormat="urn:oasis:names:tc:SAML:2.0:attrname-format:unspecified">
    <saml:AttributeValue xsi:type="xs:string">Hank</saml:AttributeValue>
  </saml:Attribute>
  <saml:Attribute Name="lastName" NameFormat="urn:oasis:names:tc:SAML:2.0:attrname-format:unspecified">
    <saml:AttributeValue xsi:type="xs:string">Scorpio</saml:AttributeValue>
  </saml:Attribute>

  <!-- multi-valued: one <AttributeValue> per group; values may be /-delimited for sub groups -->
  <saml:Attribute Name="groups" NameFormat="urn:oasis:names:tc:SAML:2.0:attrname-format:unspecified">
    <saml:AttributeValue xsi:type="xs:string">Support/GroupLeads</saml:AttributeValue>
    <saml:AttributeValue xsi:type="xs:string">Support</saml:AttributeValue>
  </saml:Attribute>

  <saml:Attribute Name="role" NameFormat="urn:oasis:names:tc:SAML:2.0:attrname-format:unspecified">
    <saml:AttributeValue xsi:type="xs:string">Admin</saml:AttributeValue>
  </saml:Attribute>

  <!-- multi-valued: one <AttributeValue> per workspace NAME -->
  <saml:Attribute Name="workspaces" NameFormat="urn:oasis:names:tc:SAML:2.0:attrname-format:unspecified">
    <saml:AttributeValue xsi:type="xs:string">Example Corp</saml:AttributeValue>
    <saml:AttributeValue xsi:type="xs:string">Example Corp EU</saml:AttributeValue>
  </saml:Attribute>
</saml:AttributeStatement>
Note: groups / role / workspaces fields are optional.
Configuring SCIM (Directory Sync)
Directory Sync automates user lifecycle management via the SCIM 2.0 protocol. It requires an active SSO connection and is available with supported IdPs including Okta and Microsoft Entra ID.
In your SSO & SCIM settings, click Configure SCIM to open the guided setup
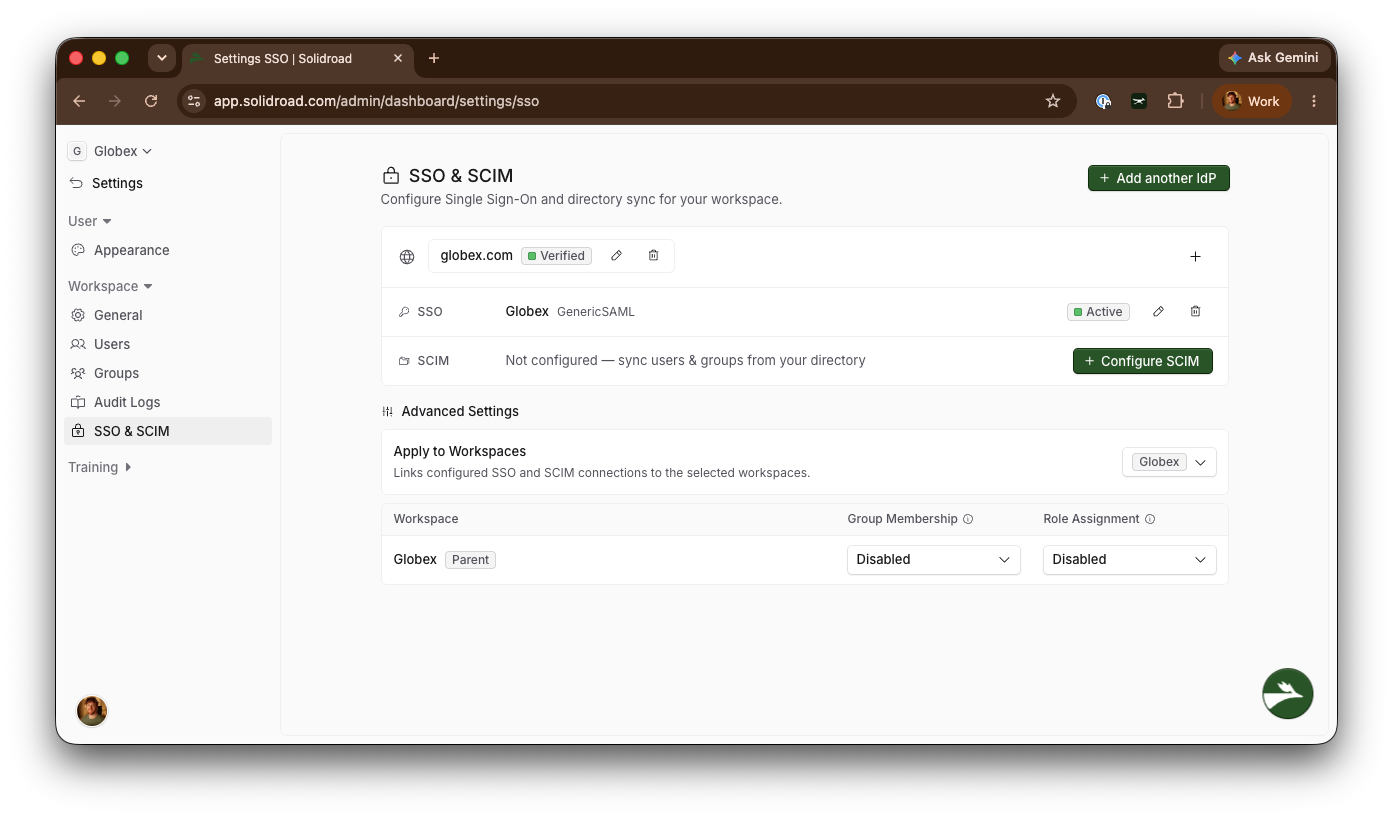
The guided setup provides your SCIM Base URL and Bearer Token, enter these in your IdP using the provider-specific steps below
During setup you can optionally map custom claims (such as
roleandgroups) to drive role and group provisioning, see Automated Role & Group Provisioning below. These are not mandatory and can be left empty if you do not wish to use this feature.
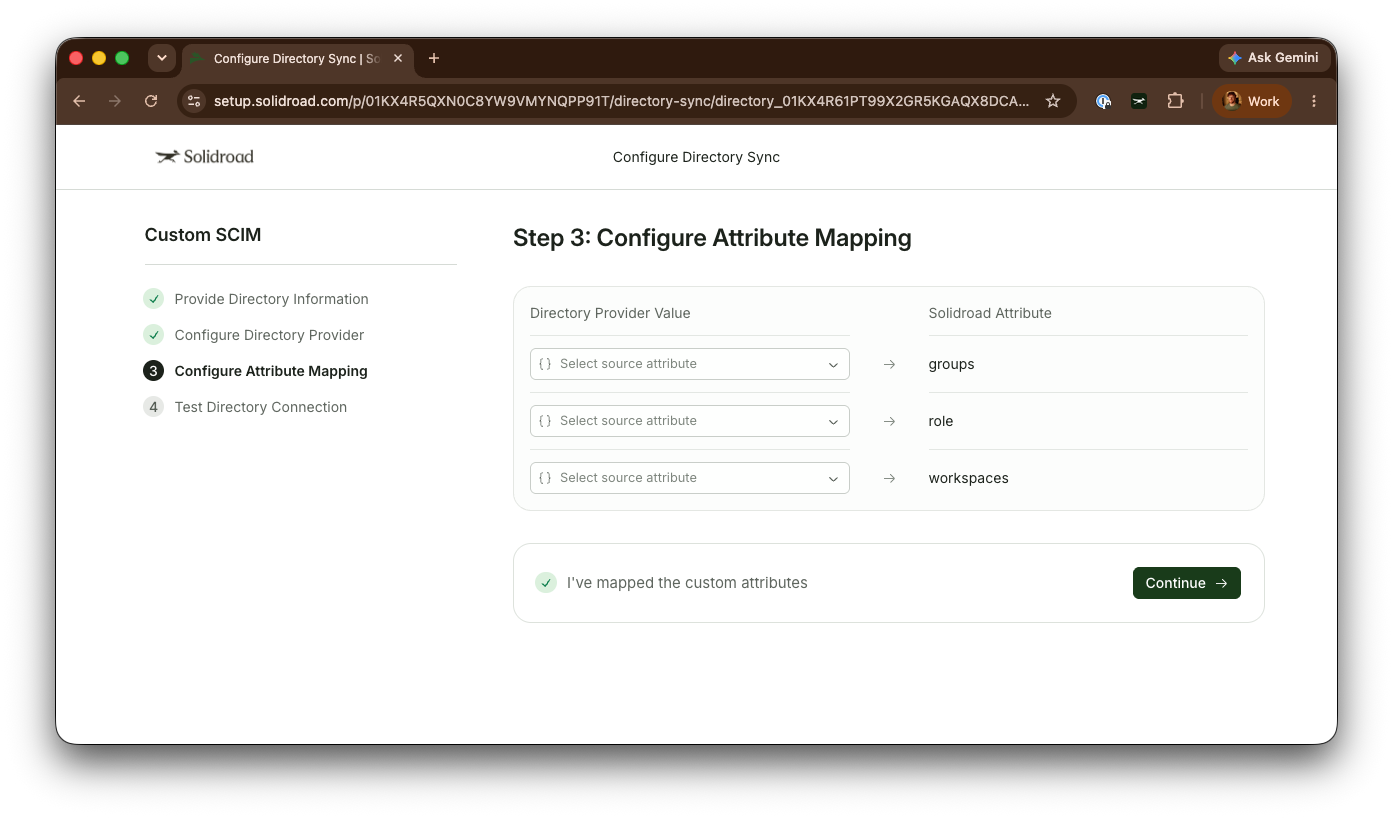
You can reconfigure your connection at any time by returning to the setup page and clicking the pencil icon next to the connection.
To change the connection later, return to the setup page and click the pencil icon next to it. With directory sync enabled:
Assigning a user to the Solidroad app in your identity provider creates their Solidroad account automatically.
Changes to a user’s name or email in your identity provider sync to Solidroad automatically.
Removing or deactivating a user in your identity provider immediately disables their Solidroad account and revokes any active sessions.
The Via SCIM Attribute and Via SCIM Groups options become valid sources in the connection’s Advanced Settings for role, group and workspace provisioning.
A raw SCIM Request for a User should look something like this:
{
  "schemas": ["urn:ietf:params:scim:schemas:core:2.0:User"],
  "userName": "alice@example.com",
  "externalId": "example-0001",
  "name": { "givenName": "Alice", "familyName": "Example" },
  "displayName": "Alice Example",
  "emails": [{ "value": "alice@example.com", "type": "work", "primary": true }],
  "active": true,
  "role": "Admin",
  "groups": ["Support/Leaders", "Support"],
  "workspaces": ["Example Corp", "Example Corp EU"],
  "employeeId": "E-0001"
}
A raw SCIM Group request should look something like this:
{
  "schemas": ["urn:ietf:params:scim:schemas:core:2.0:Group"],
  "displayName": "Example Group",
  "externalId": "grp-example-exec",
  "members": [{ "value": "scim_user_01Alice..." }]
}
SCIM groups can drive Solidroad group membership, role assignment or workspace access. How each of those works is covered in the provisioning article.
Related articles
If you have any further questions, contact the Solidroad team via the Help tab in the platform.